Writing an HTTP Wasm Component in Rust
| Audience | Software engineers who are familiar with WebAssembly and have a conceptual understanding of the WebAssembly Component Model. Code in this article will be written in Rust but you don’t need to be familiar with it to follow along. |
|---|---|
| Purpose | The purpose of this article is to guide you through the creation of a simple Wasm HTTP component. |
| Motivation | I wrote this article because I struggled to find resources on how to write HTTP services using Wasm components and the Wasmtime CLI. |
By the end of this article you will :
- write a Wasm component in Rust that answers HTTP GET requests with “Hello World”
- package your Wasm component as an OCI artifact and push it to the GitHub Container Registry
This article assumes you have:
- the rust compiler installed
- a valid GitHub Personal Access Token with
write:packagesandread:packagesscopes - docker installed (we will only use docker to login to the GitHub Container Registry)
Installing the necessary tools
The wasm32-wasip2 target makes it possible for the Rust compiler to directly compile projects to the Wasm Components format.
rustup target add wasm32-wasip2
Our Wasm component will handle requests through Wasmtime’s built-in HTTP server.
curl https://Wasmtime.dev/install.sh -sSf | bash
wkg is a suite of tools we are going to use to fetch dependencies and package our component.
cargo install wkg
cargo-expand (optional) prints fully expanded code, including generated bindings.
cargo install cargo-expand
Creating the Wasm Component project
Create a new Rust project called wasm-http-hello-world :
cargo new --lib wasm-http-hello-world
cd wasm-http-hello-world
We want to create a Rust library project, as opposed to a Rust command. This is why we are passing --lib. Just like a library, our component will expose a function (an HTTP request handler) designed to be invoked by a host (the Wasmtime CLI).
In Cargo.toml add the following target configuration:
[lib]
crate-type = ["cdylib"]
According to the Rust documentation the crate type cdylib is used:
when compiling a dynamic library to be loaded from another language.
Which is true, we are going to write a library (the Wasm component) that will be dynamically loaded into Wasmtime.
Declaring component interfaces with WIT
Wasm core modules support 4 primary data types: integers and floats of both 32 and 64 bits. Only integers and floats can come in and out of a core module.
Developers who need to interface their core module to the outside world (or to other core modules) need to make ad-hoc agreements on how to represent strings, how to pass and return values, how to layout memory etc. In other words, they need to create their own custom ABI.
Wasm components solve this problem by describing their interfaces in an Interface Description Language called WIT (WebAssembly Interface Type). WIT is backed by a standardized, unique and authoritative ABI, to which all components adhere.
At the root of your project folder create a new folder wit/ and in it create a text file world.wit.
cd wasm-http-hello-world
mkdir wit
touch wit/world.wit
The first line of wit/world.wit will be a package declaration:
package root:wasm-http-hello-world;
Package names look like foo:bar@0.2.0 and have 3 fields:
package wasi:http@0.2.0;
        ↑    ↑   ↑
        │    │   └── (optional) version
        │    └── package name
        └── namespace/organization
Note__: Not all WIT files have a package declaration. We use one because we want our component to be a standalone publishable package.
Below the package declaration, we will add a world definition. In WIT, world defines a collection of everything a component is going to import and export.
Imports are what a component needs and exports are what a component can do.
world proxy {
  include wasi:http/proxy@0.2.0;
}
The include statement includes the imports and exports of another world into the current one. Here, we include the world proxy from within the package wasi:http.
This is equivalent to writing the entire definition of the wasi:http/proxy world into our own:
package root:wasm-http-hello-world;

world proxy {
  import wasi:random/random@0.2.0;
  import wasi:io/error@0.2.0;
  import wasi:io/poll@0.2.0;
  import wasi:io/streams@0.2.0;
  import wasi:cli/stdout@0.2.0;
  import wasi:cli/stderr@0.2.0;
  import wasi:cli/stdin@0.2.0;
  import wasi:clocks/monotonic-clock@0.2.0;
  import wasi:http/types@0.2.0;
  import wasi:http/outgoing-handler@0.2.0;
  import wasi:clocks/wall-clock@0.2.0;

  export wasi:http/incoming-handler@0.2.0;
}
Notice that we exports only one interface : wasi:http/incoming-handler.
Your entire wit/world.wit file should look like this:
package root:wasm-http-hello-world

world proxy {
  include wasi:http/proxy@0.2.0
}
Fetching WIT dependencies
We just declared in wit/world.wit that our component depends on the wasi:http
package. We now need to fetch this package along with its dependencies.
At the root of your project directly, run the following command.
wkg wit fetch
wkg looks in the wit/ directory for a package with a world definition. It then fetches the package and its dependencies into a wit/deps/ directory along with a lock file.
Note: wkg fetches WIT files from GitHub Package Repository.
A package is a collections of worlds, interfaces and types. In wit/deps/ you will find all the packages wkg has fetched.
.
├── Cargo.toml
├── src
│   └── lib.rs
├── wit
│   ├── deps
│   │   ├── wasi-cli-0.2.0
│   │   │   └── package.wit
│   │   ├── wasi-clocks-0.2.0
│   │   │   └── package.wit
│   │   ├── wasi-http-0.2.0
│   │   │   └── package.wit
│   │   ├── wasi-io-0.2.0
│   │   │   └── package.wit
│   │   └── wasi-random-0.2.0
│   │       └── package.wit
│   └── world.wit
└── wkg.lock
Generating bindings
Let’s now transform our WIT files into actual Rust functions and types. We will use wit-bindgen to generate Rust bindings.
Bindings are generated glue code that implement WIT interfaces in a given language (here Rust) according to the rules of the Canonical ABI.
cargo add wit-bindgen
Your Cargo.toml file should look like this:
[package]
name = "wasm-http-hello-world"
version = "0.1.0"
edition = "2024"

[lib]
crate-type = ["cdylib"]

[dependencies]
wit-bindgen = "0.55.0"
Writing the HTTP handler
Remove everything in src/lib.rs and start from the top of the file with:
mod bindings {
    wit_bindgen::generate!({
        generate_all,
    });
}
generate! is a macro that generates Rust bindings at compile time. To avoid polluting the global namespace, we are putting the bindings in their own module.
We are going to use the following generated Rust types:
| Type | Purpose |
|---|---|
IncomingRequest |
Incoming HTTP request received by the component |
OutgoingResponse |
HTTP response sent back to the host |
OutgoingBody |
Outgoing HTTP Request or Response’s Body |
Fields |
HTTP headers |
ResponseOutparam |
Represents the ability to send an HTTP Response |
Inject the types into the current scope:
pub use bindings::wasi::http::types::{
    Fields, IncomingRequest, OutgoingBody, OutgoingResponse, ResponseOutparam,
};
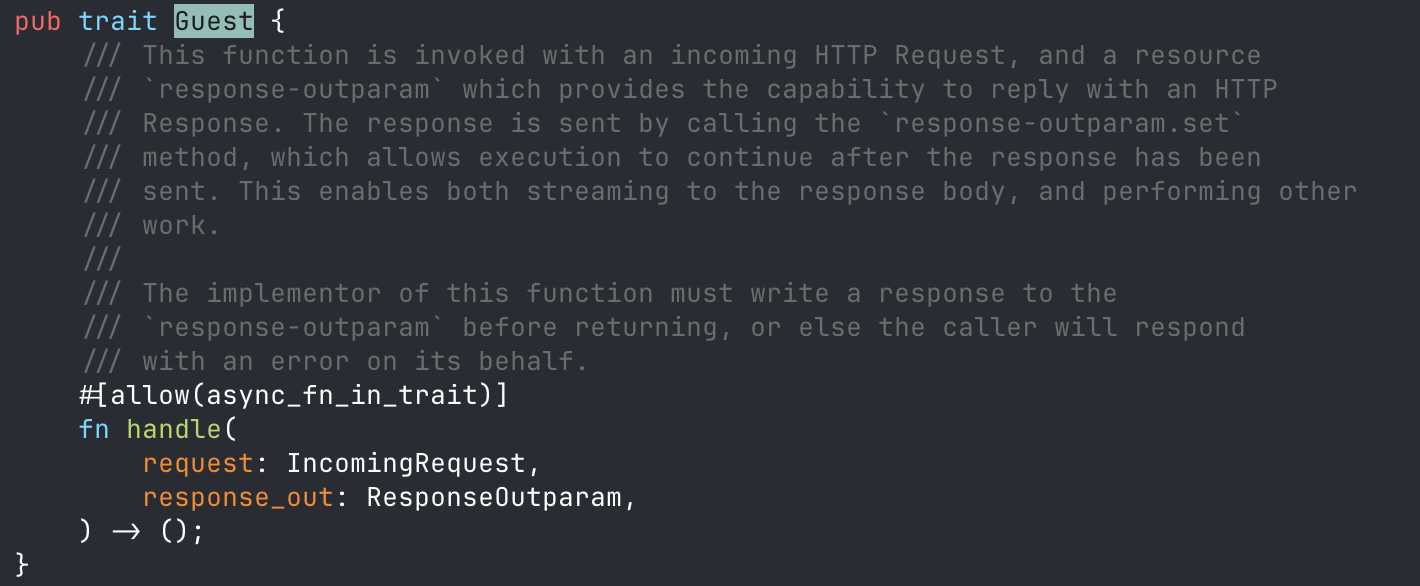
Additionally generate! generated a trait: bindings::exports::wasi::http::incoming_handler::Guest that we must implement.
This trait is the Rust representation of the WIT interface wasi:http/incoming-handler.
If you are not familiar with Rust, a trait is a set of method signatures that types can implement. They are similar to Go interfaces or C++ abstract classes.
The trait method our component must implement is fn handle(request: IncomingRequest, outparam: ResponseOutparam). This is the signature of the component HTTP handler function.
If you have cargo-expand installed, you can run cargo expand to print the generated bindings.
Now, we implement the trait:
struct Component;

impl bindings::exports::wasi::http::incoming_handler::Guest for Component {
    fn handle(_request: IncomingRequest, outparam: ResponseOutparam) {
        let hdrs = Fields::new();
        let resp = OutgoingResponse::new(hdrs);
        let body = resp.body().expect("outgoing response");

				ResponseOutparam::set(outparam, Ok(resp));

        let out = body.write().expect("outgoing stream");
        out.blocking_write_and_flush(b"Hello, world!\n")
            .expect("writing response");

        drop(out);
        OutgoingBody::finish(body, None).unwrap();
    }
}
generate! also creates an export! macro (but doesn’t run it). In turn, export! uses the trait implementation to generate the exported function that Wasmtime will call.
bindings::export!(Component with_types_in bindings);
The full src/lib.rs file should look this:
mod bindings {
    wit_bindgen::generate!({
        generate_all,
    });
}

struct Component;

pub use bindings::wasi::http::types::{
    Fields, IncomingRequest, OutgoingBody, OutgoingResponse, ResponseOutparam,
};

impl bindings::exports::wasi::http::incoming_handler::Guest for Component {
    fn handle(_request: IncomingRequest, outparam: ResponseOutparam) {
        let hdrs = Fields::new();
        let resp = OutgoingResponse::new(hdrs);
        let body = resp.body().expect("outgoing response");

        ResponseOutparam::set(outparam, Ok(resp));

        let out = body.write().expect("outgoing stream");
        out.blocking_write_and_flush(b"Hello, world!\n")
            .expect("writing response");

        drop(out);
        OutgoingBody::finish(body, None).unwrap();
    }
}

bindings::export!(Component with_types_in bindings);
Compiling and running the component
Build the component:
cargo build --release --target Wasm32-wasip2
The resulting .wasm file will be compiled in target/wasm32-wasip2/release/wasm_http_hello_world.wasm. The file should weight less than 100KB.
Run the following Wasmtime command, it will spin-up an HTTP server on http://0.0.0.0:8080 that redirect requests to instances of our component.
wasmtime serve -Scli -Shttp target/Wasm32-wasip2/release/wasm-http-hello-world.wasm
You can test it with curl -i localhost:8080
HTTP/1.1 200 OK
transfer-encoding: chunked
date: Mon, 13 Apr 2026 23:22:20 GMT

Hello, world!
Packaging and publishing the Wasm Component as an OCI image
At the root of the project, run the following two commands to authenticate, package and publish the component.
docker login ghcr.io -u <your GH username>
wkg oci push ghcr.io/<your-github-username>/wasm-http-hello-world:latest target/Wasm32-wasip2/release/Wasm_http_hello_world.Wasm
If the command was successful, your Wasm component should now be visible in the “Packages” tab of your GitHub profile: https://github.com/<your-github-username>?tab=packages. Note that by default your package is private. You can change its visibility in your package settings.